Deployment with GitHub Actions
You have a Kubernetes cluster and want to automate deployments and other cluster operations directly from your GitHub repository. This guide helps you securely connect GitHub Actions to your Kubernetes cluster so you can deploy applications, manage services, and perform maintenance tasks automatically.
Background Knowledge
GitHub Actions help automate tasks directly from your repository. For our Kubernetes setup, we use them to manage deployments and other cluster operations, which makes our processes more efficient and consistent.
The connection between GitHub Actions and Kubernetes requires a secure authentication setup using a ServiceAccount, authentication tokens, and GitHub Secrets. This allows GitHub Actions runners to execute kubectl commands against your cluster safely.
Prerequisites
Before starting, make sure you have:
- A working Kubernetes cluster with kubectl access
- A GitHub repository with Actions enabled
- Administrative access to your Kubernetes cluster
- The
setup_github_actions.shscript is available in your cluster configuration
Steps
0. Git setup
The first step is to get Git access to your server.
Make sure you are SSH-ed into the server, then generate a new SSH key with the name of id_github
If you already have a GitHub SSH key in a password manager, this will probably be automatically detected.
ssh-keygen -t ed25519 -C "hetzner" -f ~/.ssh/id_githubcat ~/.ssh/id_github.pubAdd the key in GitHub
The last Git step is to make sure we use this key for GitHub-related tasks.
# edit the SSH config filenano ~/.ssh/config
# add the followingHost github.com HostName github.com User git IdentityFile ~/.ssh/id_github IdentitiesOnly yesNow go to your GitHub account, create a new repo, and push the infrastructure code to it that you have on your server.
1. Run the Setup Script
The goal is to minimally interact with the cluster; instead, most interaction will be done through GitHub Actions. We have created some for you, but for them to work, they need access to your Kubernetes Cluster. To do that, we need to set up credentials.
The kit comes with a script to generate these credentials for you by running the following command.
chmod +x ./setup_github_actions.sh./setup_github_actions.shThis script creates a dedicated ServiceAccount in Kubernetes, generates a long-lived authentication token for this account, and outputs the necessary credentials you’ll need.
2. Collect Required Credentials
The script will output three important values:
KUBE_HOST: Your Kubernetes API server addressKUBE_CERTIFICATE: The cluster’s CA certificate (base64 encoded)KUBE_TOKEN: The ServiceAccount authentication token
Copy these values securely as you’ll need them in the next step.
3. Add GitHub Secrets
Navigate to your GitHub repository settings and add the following secrets:
Go to Settings → Secrets and variables → Actions → New repository secret.
Add these three secrets:
- Name:
KUBE_HOST, Value: [your cluster API server address] - Name:
KUBE_CERTIFICATE, Value: [your base64 encoded certificate] - Name:
KUBE_TOKEN, Value: [your ServiceAccount token]
4. Test the Production Deployment
To test the production deployment, we need to have a new app. Check the add a new app guide for more information. You can also go to verification step for deploying Redis if you just want to try it.
Commit your code and trigger the production deployment manually:
Go to your GitHub repository → Actions → Select your new app workflow → “Run workflow”
Manual triggers will always deploy the “prod” version of the app you create. While automated deployments (next step) deploy the dev version of the app.
5. Automated Development Deployment
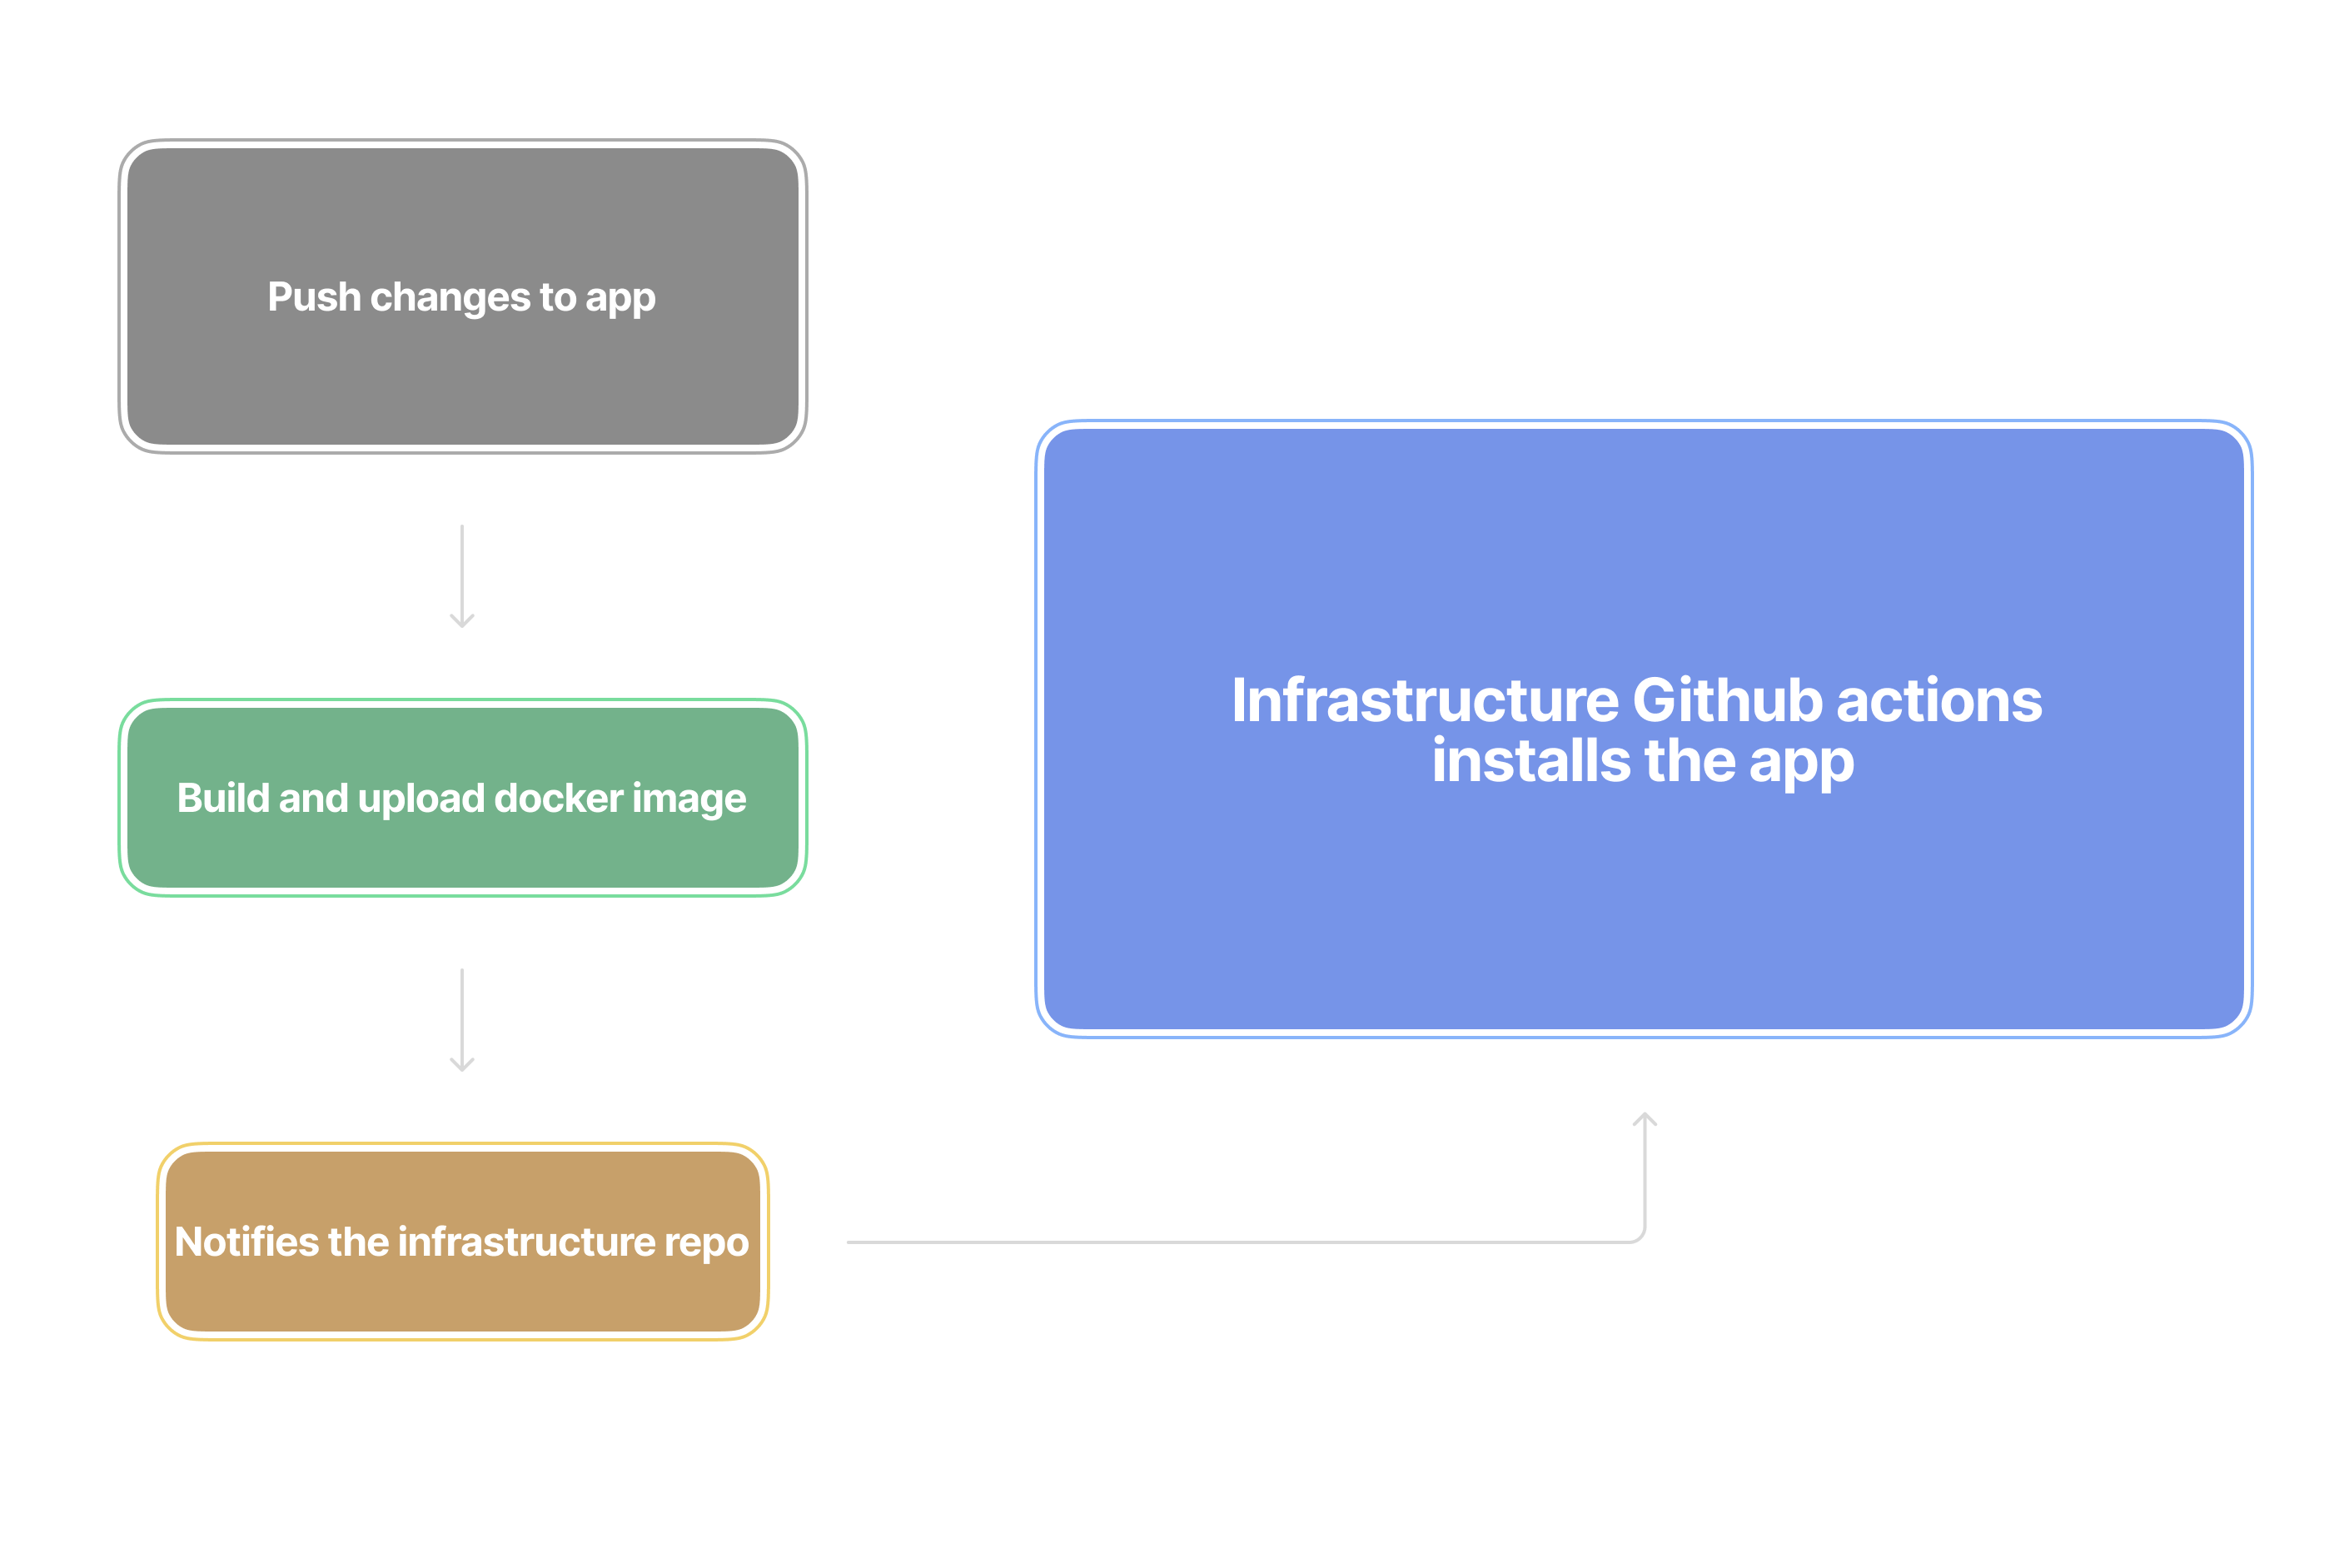
The application you created should live in a separate repository. Whenever you make changes to that application, you can trigger a development deployment in the Kubernetes cluster repository by using repository_dispatch.

Here is an example of a workflow that will build, upload to Docker Hub, and deploy a Go service to a Kubernetes cluster. The main part of this is the Trigger Workflow in Cluster step. This is what will notify the infrastructure repository to deploy the service.
name: Build and Deploy Go service
on: push: branches: - "main" pull_request: branches: - "main" workflow_dispatch: inputs: custom_tag: description: "Custom image tag (optional)" required: false type: string default: "latest"
env: REGISTRY: hungrimind IMAGE: IMAGE_NAME DISPATCH_REPO: hungrimind/infrastructure DISPATCH_EVENT: SERVICE_NAME-build-completed
jobs: test: runs-on: ubuntu-latest steps: - uses: actions/checkout@v4
- name: Set up Go uses: actions/setup-go@v4 with: go-version: "1.22"
build-and-push: needs: test runs-on: ubuntu-latest steps: - uses: actions/checkout@v4
- name: Set version id: version run: | if [ "${{ github.event.inputs.custom_tag }}" != "" ]; then echo "VERSION=${{ github.event.inputs.custom_tag }}" >> $GITHUB_OUTPUT else echo "VERSION=${GITHUB_SHA::7}" >> $GITHUB_OUTPUT fi
- name: Login to Docker Hub uses: docker/login-action@v3 with: username: ${{ secrets.DOCKERHUB_USERNAME_HUNGRIMIND }} password: ${{ secrets.DOCKERHUB_TOKEN_HUNGRIMIND }}
- name: Set up Docker Buildx uses: docker/setup-buildx-action@v3
- name: Build and push service uses: docker/build-push-action@v5 with: push: true tags: | ${{ env.REGISTRY }}/${{ env.IMAGE }}:${{ steps.version.outputs.VERSION }} ${{ env.REGISTRY }}/${{ env.IMAGE }}:latest
- name: Trigger Workflow in Cluster if: success() run: | curl -L \ -X POST \ -H "Accept: application/vnd.github+json" \ -H "Authorization: Bearer ${{ secrets.ORG_TOKEN }}" \ -H "X-GitHub-Api-Version: 2022-11-28" \ https://api.github.com/repos/${{ env.DISPATCH_REPO }}/dispatches \ -d '{"event_type":"${{ env.DISPATCH_EVENT }}","client_payload":{"image_tag":"${{ steps.version.outputs.VERSION }}"}}'Verification
After setting up your GitHub Actions connection:
Test that your workflow can connect to the cluster by making sure the infrastructure and your app repositories have their workflows, then simply make a commit in your app repository to see it build, upload, and notify your cluster to deploy.
kubectl get pods -n SERVICE_NAMEYou should see your cluster nodes running.
The Docker images are named after the GitHub commit ID. You should be able to see this in DockerHub.
Deploy Redis with GitHub Actions
You can test the deployment using our preconfigured Redis app.
- Navigate to your repository in GitHub.
- Go to the “Actions” tab.
- Click on the “Deploy Redis” workflow.
- Click on “Run workflow”.
- You should see the workflow starting with logs, and once done, you should be able to run the following command to verify within the cluster.
kubectl get pods -n redis