Guided Tour Cloud
Kubernetes is meant to be used in the cloud (on a server). After all, it is a backend infrastructure, and backends need to be hosted somewhere. For this guide, we will be using a server from Hetzner.
This guided tour is a walkthrough of setting up Kubernetes Kit on a server. Let’s get started.
Configure a Server
Find a server that fits your needs. The guide will follow renting a dedicated server Hetzner.
When you make the purchase, you will need to select either a password for SSH or a public key. This guide uses a public key, which is more secure.
Generate and print key
Run the following command to generate a new SSH key on your local machine. You will be asked to enter a passphrase, which is like a password, so don’t forget it.
ssh-keygen -t ed25519 -C "hetzner" -f ~/.ssh/id_hetznercat ~/.ssh/id_hetzner.pubUse this public key in the renting process.
Recommendation: Store your keys in a password manager.
Configure SSH
To connect to your server, we will use SSH. To this, you can use the following command.
ssh -i ~/.ssh/id_hetzner root@your.server.ip.addressHowever, typing this every time is not very convenient. We can instead update the ~/.ssh/config file with the following.
Find your IP address for the machine in Hetzner.
Host hetzner HostName your.server.ip.address User root IdentityFile ~/.ssh/id_hetznerNow you can connect to your server by running:
ssh hetznerInstall Linux
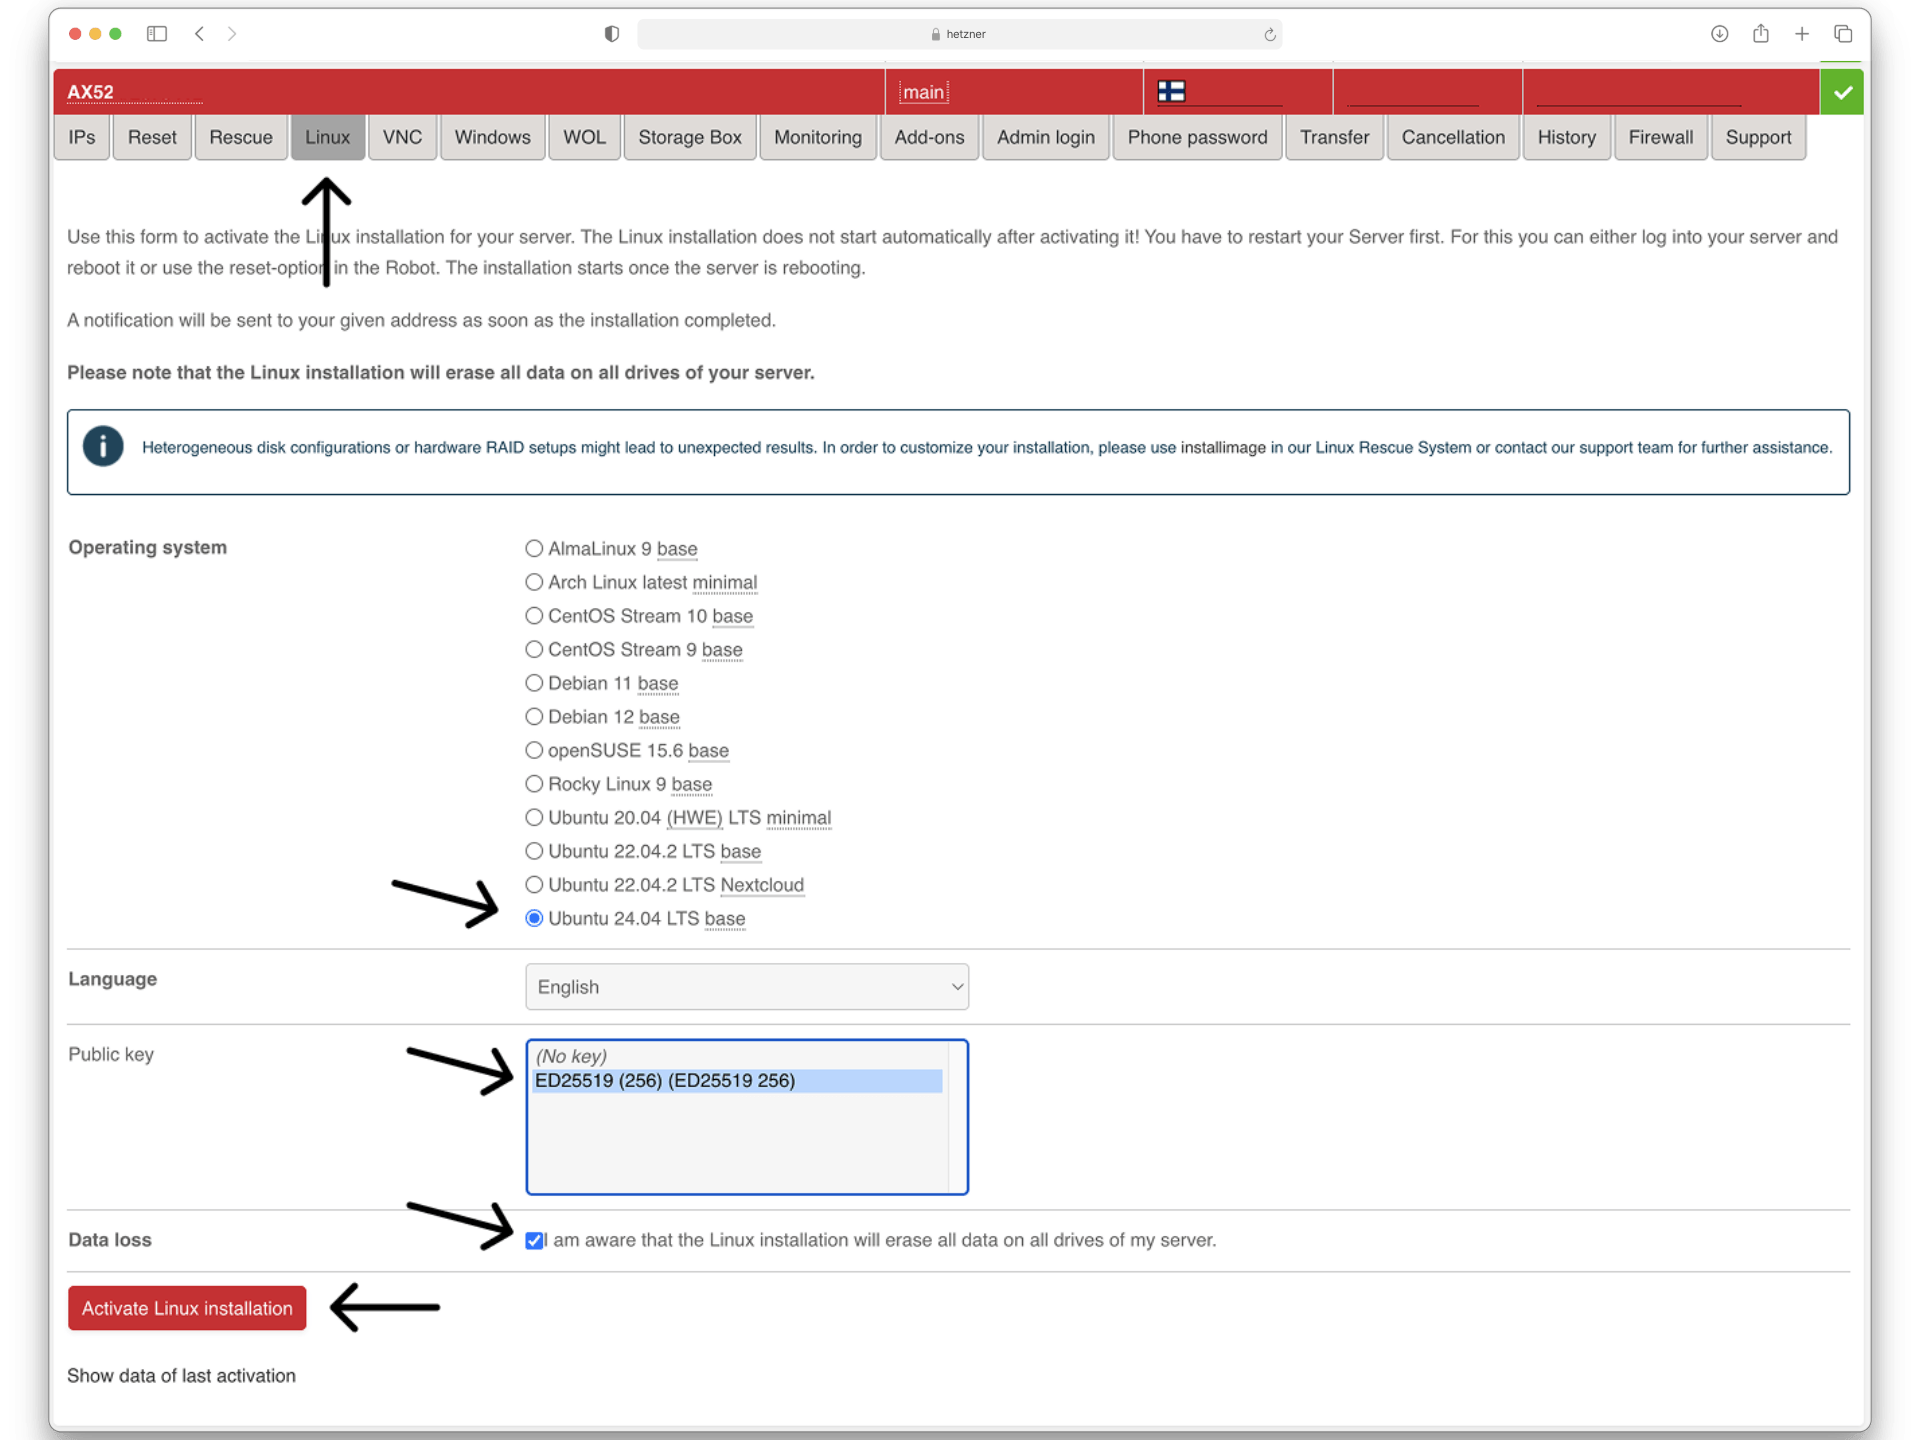
In order for any of this to work, our server needs an operating system. The most common one is Linux. Navigate to your server in Hetzner and follow the image.
Now you should be able to SSH into your server by running ssh hetzner.
Kubernetes setup
Install the Hungrimind CLI globally using npm. This is used to pull down the latest version of Kubernetes Kit.
sudo apt updatesudo apt install nodejssudo apt install npmnpm install -g @hungrimind/hungrimind-cliAuthenticate
Log in using your GitHub account via the secure device flow:
hungrimind loginFollow the instructions in the terminal to complete the authentication process.
Create a New Kubernetes setup
Generate your Kubernetes setup that uses the boilerplate with the CLI:
hungrimind kubernetes create my_infrastructureReplace my_infrastructure with your desired project name.
Answer the prompts
Kubernetes works with configuration files. These need to have the correct values for it to work. Within the Kubernetes Kit, each value contains a comment about how it’s used.
Once this is done, you will have successfully cloned the project to your local machine. The next step is to deploy the preconfigured apps to the cluster, which is done by running the first_install.sh script. You can do this within the setup flow or do it later.
✅ You should now have a cluster running! Run
kubectl get pods --all-namespacesto see the running app.
Deploy an App
First, navigate into your infrastructure folder, then run the following command to create an app: hungrimind kubernetes add app. You need to set the domain name to the domain of your server.
You can use
machine-infofor app name andhungrimindas the Docker username; this is a public image we created for you to test with.
hungrimind kubernetes add app? App name: machine-info? App description: machine info? Production domain (e.g., server.hungrimind.com): server.your-domain-name.com? Development domain (e.g., server-dev.hungrimind.com): server-dev.your-domain-name.com? Docker username: hungrimindNow you should be able to see a folder based on the name you provided. The next step is to deploy it to our cluster.
To ensure your shell session can communicate with the cluster, you must set the KUBECONFIG environment variable. This is necessary every time you start a new SSH session or open a new terminal window on the server.
While the installation script initially sets this variable for the environment it runs in, subsequent sessions require you to execute the following command:
export KUBECONFIG=/etc/rancher/k3s/k3s.yaml
cd machine-infohelm upgrade --install machine-info . --namespace machine-info --create-namespace --values ./values.yaml --debug --waitNow you should see your app running when you do:
kubectl get pods -n machine-infoYou should be able to access it through the domain we entered in the setup: http://server.your-domain-name.com/version.
Next Steps
Ready to deploy your own application? Check out our guide on Add a New App to learn how to deploy custom applications to your cluster.